OK!! I've been locked away the last few week. life kicks in from time to time! and when I have had the time I've been ever expanding on my collection of Heroquest in general. one thing i always loved was the furniture in the game, those little skulls and rats you could just plug in added a great little bit of added detail. well I wanted to take it a step further! I think I may be coming out of the closet right now in admitting I have a fetish for buying sprue bits off ebay :) I literally have hundreds if not thousands of bits that ill never have much use for. but to me, that's my looting!! buying something for next to nothing (lets be honest everyone loves winning a auction) getting it, unwrapping and sifting through all the marvels inside. seriously I've got so much junk it unbelievable! but in that junk sometimes there are things that come in handy. so I've made full use off all sort of bits i could find that seemed appropriate just to push that detail level a little further and make that dungeon furniture that little bit more interesting.
I've got all of the furniture currently sitting in various states of completion. so here are the first few that I've completed so far.
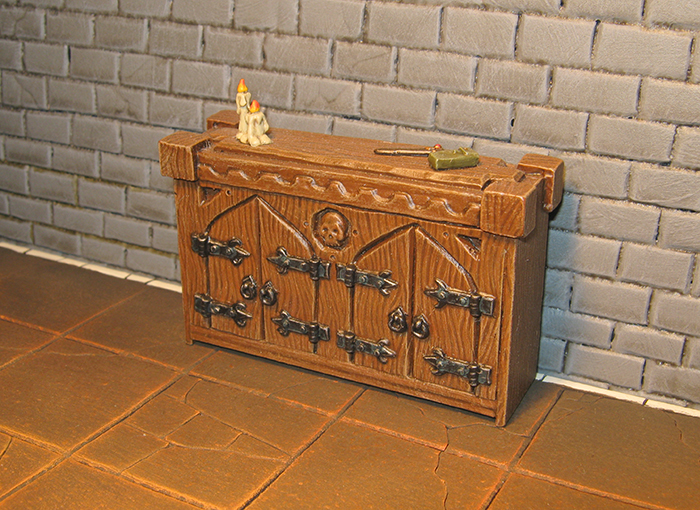
Throne
nice and simple one really. i kept with the original plastic frame from the game. a little trimming and filing to soften the edges a little. plasticard for the seat and back rest, i then sculpted some simple padded seating and arm rests and glued in a empire (i think) shield emblem. this was probably the simplest and easiest to make. taking me about 20 minutes to make and about the same again to paint
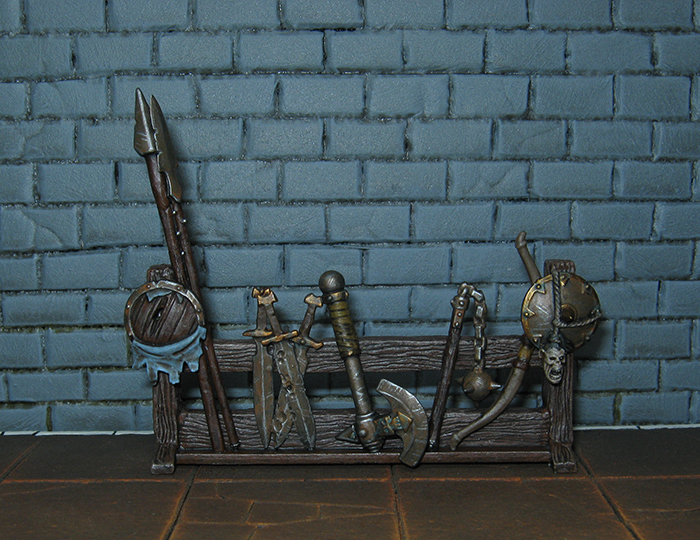
Torture Rack
For this one i didnt really have much idea what i wanted to do. after searching through my bits box i didnt have too much that would benefit here, ive got hundreds of skulls! GW love skulls dont they? you cant buy anything of GW these days without it at least having 1 skull somewhere on the sprue or the base. thats not a bad thing though. I love skulls! its true!!. so detail wise on this model that i wanted over the original.
so i began chopping up some 1.5mm plasticard to form the basis of the rack. carving wood grain in as i went along. one that was completed i then made some metal base plates to put around the bottom.
one thing here i struggled with, and always have. are those studs. HOW THE HELL!!!!! do the great scultpers manage to create all these fine detailed studs on figures? its beyond me! so what did i do? i drill some tiny holes, stuck in some paper clips and trimmed them off nice and short..it works but i want better in future.
next up i was onto the details.
cuffs. i created these with green stuff wrapped around a cotton bud tube. I smeared vaseline on the tube then rolled the green stuff around it. when it was about 50% cured i then cut it to size. when the greenstuff had fully dried i slid it off the tube, separated my cuts and then picked out the best looking cuffs from my cuts and sat them to one side for later.
next up i decided on rope to attach to those cuffs (it was a toss up over rope or chain)
to make the rope I just use some fuse wire and twist it together. for this rope i think i used 3 pieces at once. i glue each end to a old bit of sprue to work as a winder. then just twist away. it will begin to pull together and look like rope. easy right? try it. its very effective.
for the handles i used a offcut from a bbq skewer as the log and some green stuff to build up the handles and such.
after that i needed to create some foot clamps in the same mold as the cuffs. to do this i applied the same method as the cuffs. except this time i actually put vaseline on the tubes and shaped the green stuff over the top of them.
last of all was the last few details. i threw a bone and skull on the top from my bits box (and yes it is organized into components type too. im that anal! :) )
i still wanted more though. so i tried my hand at hand sculpting a cobweb........stupid idea right? well there is the finished article.......cant say im fully happy with it. but i know im not a great sculptor. so for a first time attempt with no real techniques known how to create a good looking webbing..lets just say its not a total disaster. oh and that little black blob next to it? its a spider of course! :)
if you know where that spider is from ill coff up more details!
more to come soon